Things to do in Seattle with guests

Things to do in Seattle with guests

It’s summer in Seattle which can only mean one thing: bring on the guests! When all of your family and friends live on the East Coast – also known as the sticky, humid coast – the Pacific NW can provide a more than welcome summer reprieve, not to mention there are some pretty great people here to see 😉

Total, we have over three weeks of guests this summer – a record for us! It can be easy to fall into your own routine after you live in one place for a few years and you might forget what it’s like to be a visiter. So, what do you do with your friends and family when they come to visit?

Here’s how with my list of top things to do in Seattle with guests:

  • Discover something new: Whether it’s a food tour of Pike’s Place market, a tantalizing walk through Theo’s Chocolates, or up in the trees at the Treehouse Master’s headquarters, a guided tour can show even the most settled Seattle native that there’s always something new to see and learn. You could even take a class, like Issaquah’s Art by Fire’s glass-blowing class, where you’ll not only learn something new, your guests will take home a one-of-a-kind souvenir!
  • Get high: I mean off the ground, not the other way (even though that’s technically legal here). Seattle has the most beautiful backdrop I’ve ever seen and what better way to see it than from high up. From the top of the Space Needle (or the cheaper and taller Columbia Tower), to a lookout on a surrounding mountain (the “Issaquah Alps” offer great views of the Snoqualmie Valley), to up in the air on a scenic flight by seaplane, take your guests breaths away (along with your own) every time.
  • Head out of town: Seattle has a lot to see, but what about all of the great day trips? Especially great for returning visitors! What’s on our list this summer? Bainbridge and Whidbey islands are a short ferry ride away, Mt. Rainier is famous for it’s summer wildflowers and Leavenworth & Wenatchee are full of outdoor adventure and yummy wine.
  • Attend an event:  Summer food and music festivals, outdoor concerts, theatre performances, and even farmer’s markets are a great way to get any visitor out among the locals. This summer, I’m looking forward to taking my parents to see Ringo Starr on the lawn of Chateau Ste. Michelle and seeing The Book of Mormon with my in-laws at the Paramount!
  • Show off the local flavor: Eat, drink, and eat some more of the best food the city has to offer. Seattle is well-known for seafood, so we always plan at least one big seafood dinner with guests. We also just like to take guests to our favorite restaurants like The Pink Door and The Tin Table, not to mention I’m always willing to show off all of the wineries and breweries that call Washington home, like Patterson Cellars and Seapine Brewing Company. Finally, take guests to those little, quirky joints that make your town unique. For us, that means taking my folks to Issaquah’s own Triple XXX for a greasy burger and a big mug of ol’ fashioned root beer. Seriously, check it out, it’s quirky and dang good!
  • Take a hike: To me, the term “hike” can sometimes sound scary, like a 10-mile glute-burning, CamelBak drinking, hot and sweaty trek. Even though the Seattle region has its share of mountains, there are plenty of hikes (aka scenic walks) that are far from arduous. From flat paved paths to rocky uphill climbs, there’s a perfect hike for all of your guests. You can identify which hikes are best for you by using the Washington Trails Association Hiking Guide where you can filter hikes by mileage, difficulty level and trail attractions, and Tmber.com often features a narrated video of the actual trail so you can get a real sense of how tricky or picturesque it may be.

Although I called out many Seattle-specific things to do and see with guests, you can apply all of these activities to any city, anywhere! Basically, entertaining out-of-town guests this summer doesn’t have to be the same ol’ museums and cheesy attractions that trap all the other tourists. You’re a local, give your friends and family the local experience and show off all your home has to offer. Who knows, maybe you’ll even see, learn or do something new along the way!

Advice from my first kitchen remodel

RemodelBlogCover

Cheers, we just survived our first remodel! Check it off the official “how you know you’re an adult” list.

We didn’t rip out any cabinets or tear down any walls, but our basic kitchen remodel still had it’s share of stress, anxiety and ultimately, satisfaction and pride. It took a lot of research and decision-making to get to this point. Here’s our advice:

Find out what to expect:

If you’re like us and never remodeled before, it’s important to educate yourself on how to hire a contractor, types of materials, appliances, etc. There are too many horror stories out there about shifty contractors, shoddy materials, and some real lemons, to take any chances on just anyone or anything. This is your house, remember, you only want the best! I highly suggest joining Angie’s List and checking out these resources online:

Kitchen remodel before photo

Before the remodel

Kitchen remodel after photo

After the remodel (New countertops, backsplash, range, sink, faucet, lighting)

Ask questions – lots of them:

When you’re hiring a contractor, or anyone really, to work inside your home, you’ll want to make sure you’re hiring someone who is courteous, efficient, and ultimately, someone you can trust. Interview at least three contractors at your home and receive an estimate. Prepare for each meeting with a list of questions, and don’t be afraid to dig in to get more information. I found a number of good websites with important questions to ask a contractor, AND, don’t forget, to also ask their references/previous clients, since you’ll definitely be giving them a call, too:

Kitchen remodel before photo

Before!

Kitchen remodel after photo

After!

Have a vision:

There is no worse feeling than walking into a granite or tile warehouse and feeling completely overwhelmed at all of the options. (Trust me, my husband needed to lie down after our first trip.) Get ideas from the internet (Houzz and Pinterest are great places to start). Narrow down your color palette (and budget). Take home samples whenever possible. Take photos at the warehouse. If you have difficulty, ask your contractor if they work with a designer. We never would have found our tile without a design consultation.

Expect to get detailed…very detailed:

Do you want a straight or demi edge on the countertops? Where does the soap dispenser go in the relation to the faucet? What color grout? Do you want LED or halogen lights under the cabinets? These are all decisions we had to make that we never thought about in our original plan, but if you have a thorough contractor, he/she will bring them up and you’ll have to answer.

Kitchen remodel before photo

Before!

Kitchen remodel after photo

After!

Be prepared to “rough it”:

Depending on your remodel, you’ll probably be without some appliances, running water, or maybe just some countertop space, for a few days. We couldn’t use our kitchen for about four days, which meant stocking up on paper products, ordering pizza and eating out. Talk about a great excuse to try some new restaurants! Also, there will be major dust and debris, no matter how many drop cloths and plastic curtains are used. Learn to live, hopefully only briefly, with a little extra dirt.

Take before and after photos:

They’re great for the ol’ scrapbook, and to show your curious friends and family. You can even offer them to your contractor to use as a reference for future clients. It’ll also help put the whole remodeling process in perspective and you’ll appreciate your decision to remodel a whole lot more. Just think of remodeling like childbirth: you ultimately won’t remember the pain, you’ll just take pleasure in the resulting joy (and that sweet new kitchen smell).

I hope you found these tips helpful. Now please excuse me while I go hug my new countertops.

Snoqualmie & Steak: Recipe for two

This past weekend was a beauty so we headed over to Snoqualmie Falls and walked the reopened lower falls viewpoint trail (and based on the crowd, everyone else had the same idea). Unlike a number of…let’s say, brave individuals, we did not climb over the fence and venture even further, but the view from the lower deck is still pretty spectacular.

Snoqualmie Falls

What better way to cap off the weekend than with one of my big Sunday dinners! This week, I made Bobby Flay’s grilled flank steak with homemade balsamic BBQ sauce and cheesy bread, grilled avocado, and oven-roasted asparagus.

Steak dinner recipe for two

I’d recommend it all! Find recipe links or recipes written out below. I included any notes of tips or changes I made to the recipes.

Steak Dinner Recipe for Two

Bobby Flay’s Flank Steak with Balsamic Barbecue Sauce and Cheesy Bread 

Bobby Flay steak recipe for two Bobby Flay grilled steak recipe for two

Notes:

  • Tip: Flank steak can be tough, so before it goes on the grill, gently score each side with a sharp knife to form a criss-cross pattern. This way, the BBQ sauce can reach more of the meat. Mmm.
  • Tip: Holy moses, does this BBQ sauce have a TON of ingredients! Now I know why most folks buy theirs in a bottle. Get all your ingredients out on the counter ahead of time to ensure you don’t miss anything.
  • Change: I didn’t have a baguette, so I used whole clove garlic sourdough. I also didn’t have any monterey jack cheese, so subbed cheddar instead. Still tasted terrific! You can’t go wrong!

Grilled Avocado

steak dinner recipe for two grilled avocado

It’s really hard to make an avocado any better, but add grilling one to your immediate to-do list. Just cut in half, remove the stone, and brush the flesh with a little bit of olive oil and lime juice. Sprinkle with salt and pepper, then lay halves flesh side down, directly on the grill, for 5-7 minutes. When you take them off, they’ll have a terrific light char! Good enough to just eat with a fork directly out of the skin.

Roasted Asparagus

steak dinner recipe for two Ina Garten asparagus

Again, this is Ina’s recipe. I mentioned it previously on this blog. If you don’t already, keep this recipe handy.

If you’re lucky, you’ll have some leftover steak you can eat later with some homemade mac n’ cheese. Droolllllll.

Ok, all these photos of food are making me hungry. It’s lunch time, right?

Top ten Europe trip packing tips

top Europe packing tips

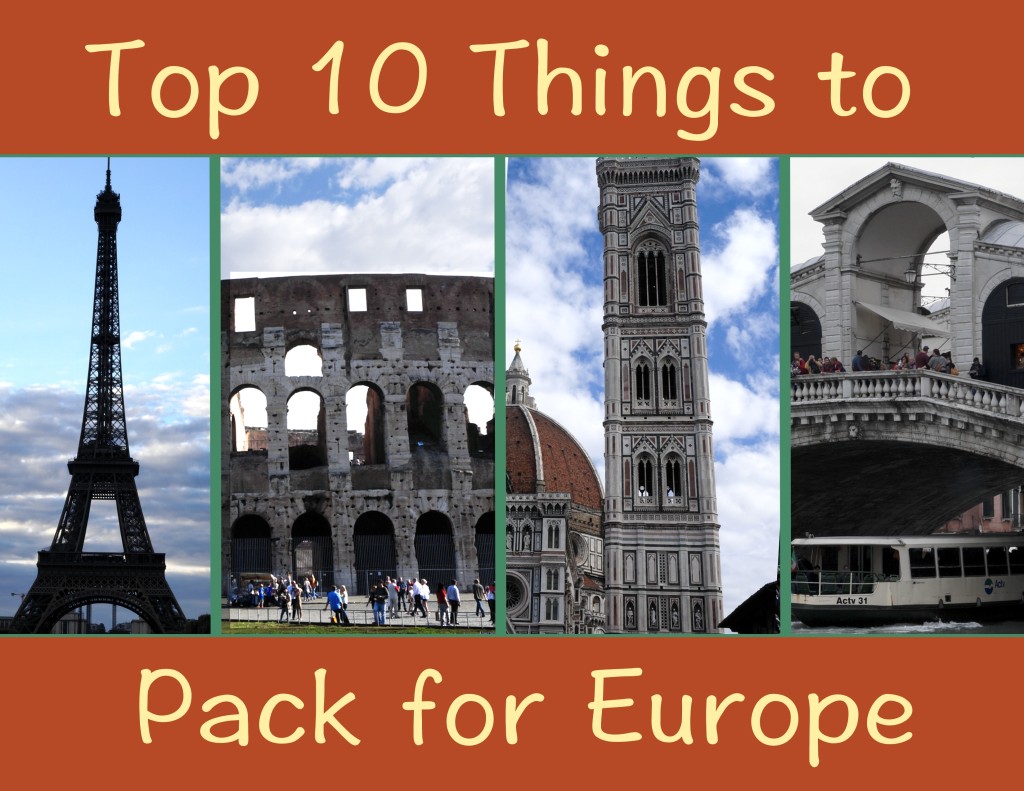
A friend of mine is currently having the time of her life in Paris, making me even more excited for our trip back later this year. On our first trip, we were set to hit four cities in 13 days and I wanted to be uber prepared so I could (try to) stress less and immerse myself more. Turns out, I did pack a few key items, and acquired some others along the way that helped make our trip comfortable, fun and even easy! As we look forward to our next European adventure, here is my list of the top ten items you should pack before your next big trip!

top Europe packing tips items photo


My Top 10 Europe Trip Packing Tips:

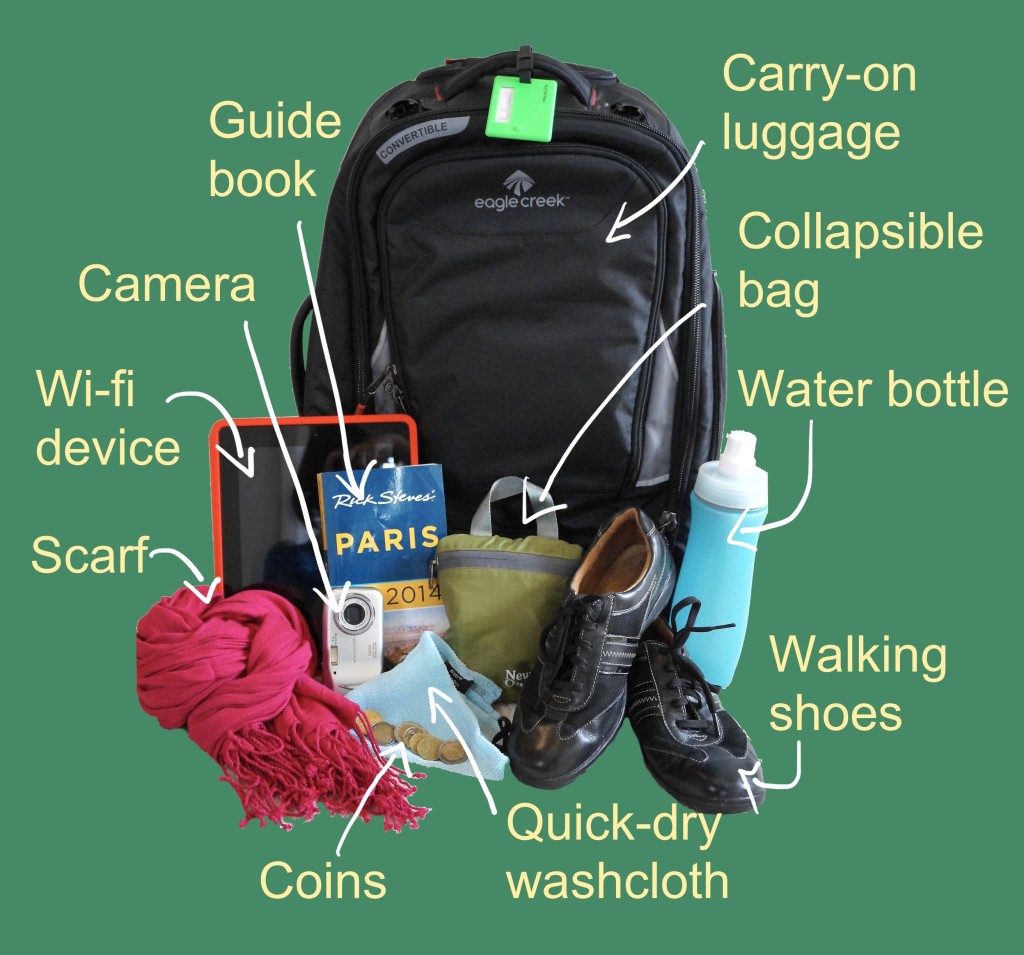
Good carry-on suitcase: No matter the length of your trip, you want to try to pack everything into one carry-on suitcase. While you might have to do laundry (or have it done by your hotel), you won’t have to worry about losing luggage or trying to manage too many bags as you walk down a narrow busy alleyway to your hotel. One bag, with two sturdy wheels and good pockets, will help you get from point A to point B seamlessly. We bought convertible backpack carry-ons, but not once did we ever use the backpack functionality. Check baggage restrictions for each flight – we found one of our bags was still too big to carry onto an inter-Europe flight.

Collapsible bags: Since you ideally want to travel with carry-on luggage, you have to maximize for space, but what do you do with all of your souvenirs when you’re wandering the city, and how the heck do you get them home? Before our trip, we purchased a collapsible backpack and tote bag that we could cram into any nook or cranny of our suitcase, but when we needed them,  could expand to provide us with extra baggage space. We used the backpack to carry jackets, maps and water bottles during days of sightseeing and used the tote bag to carry large souvenirs home safely.

Guide book: Some travelers like to be completely spontaneous abroad, however in order to get the most out of my trip, I looked to guide books and previous traveler reviews and advice. I absolutely love Rick Steves guide books. All the little nuances of when to go see certain sites, which entrances are less crowded, which sites are must-sees and which ones you can pass on, helped us immensely to plan ahead and maximize our time each day. I wouldn’t travel to Europe without Rick, and neither should you.

Walking shoes: The best thing you can bring on a European vacation is a good pair of walking shoes. American tourists tend to be extra cautious about the shoes we wear in Europe since we hear that Europeans can point out Americans by their sneakers alone. Lies. We walked almost EVERYWHERE in Paris and across Italy, and let me tell you, I would have killed for a pair of sneakers. I kicked myself with my sore booted foot every time we stepped onto the metro and saw French men and women in sneakers. Europeans are more likely able to tell you’re American by your accent and lost expression than what you’re wearing on your feet, so what you have on might as well be comfortable!

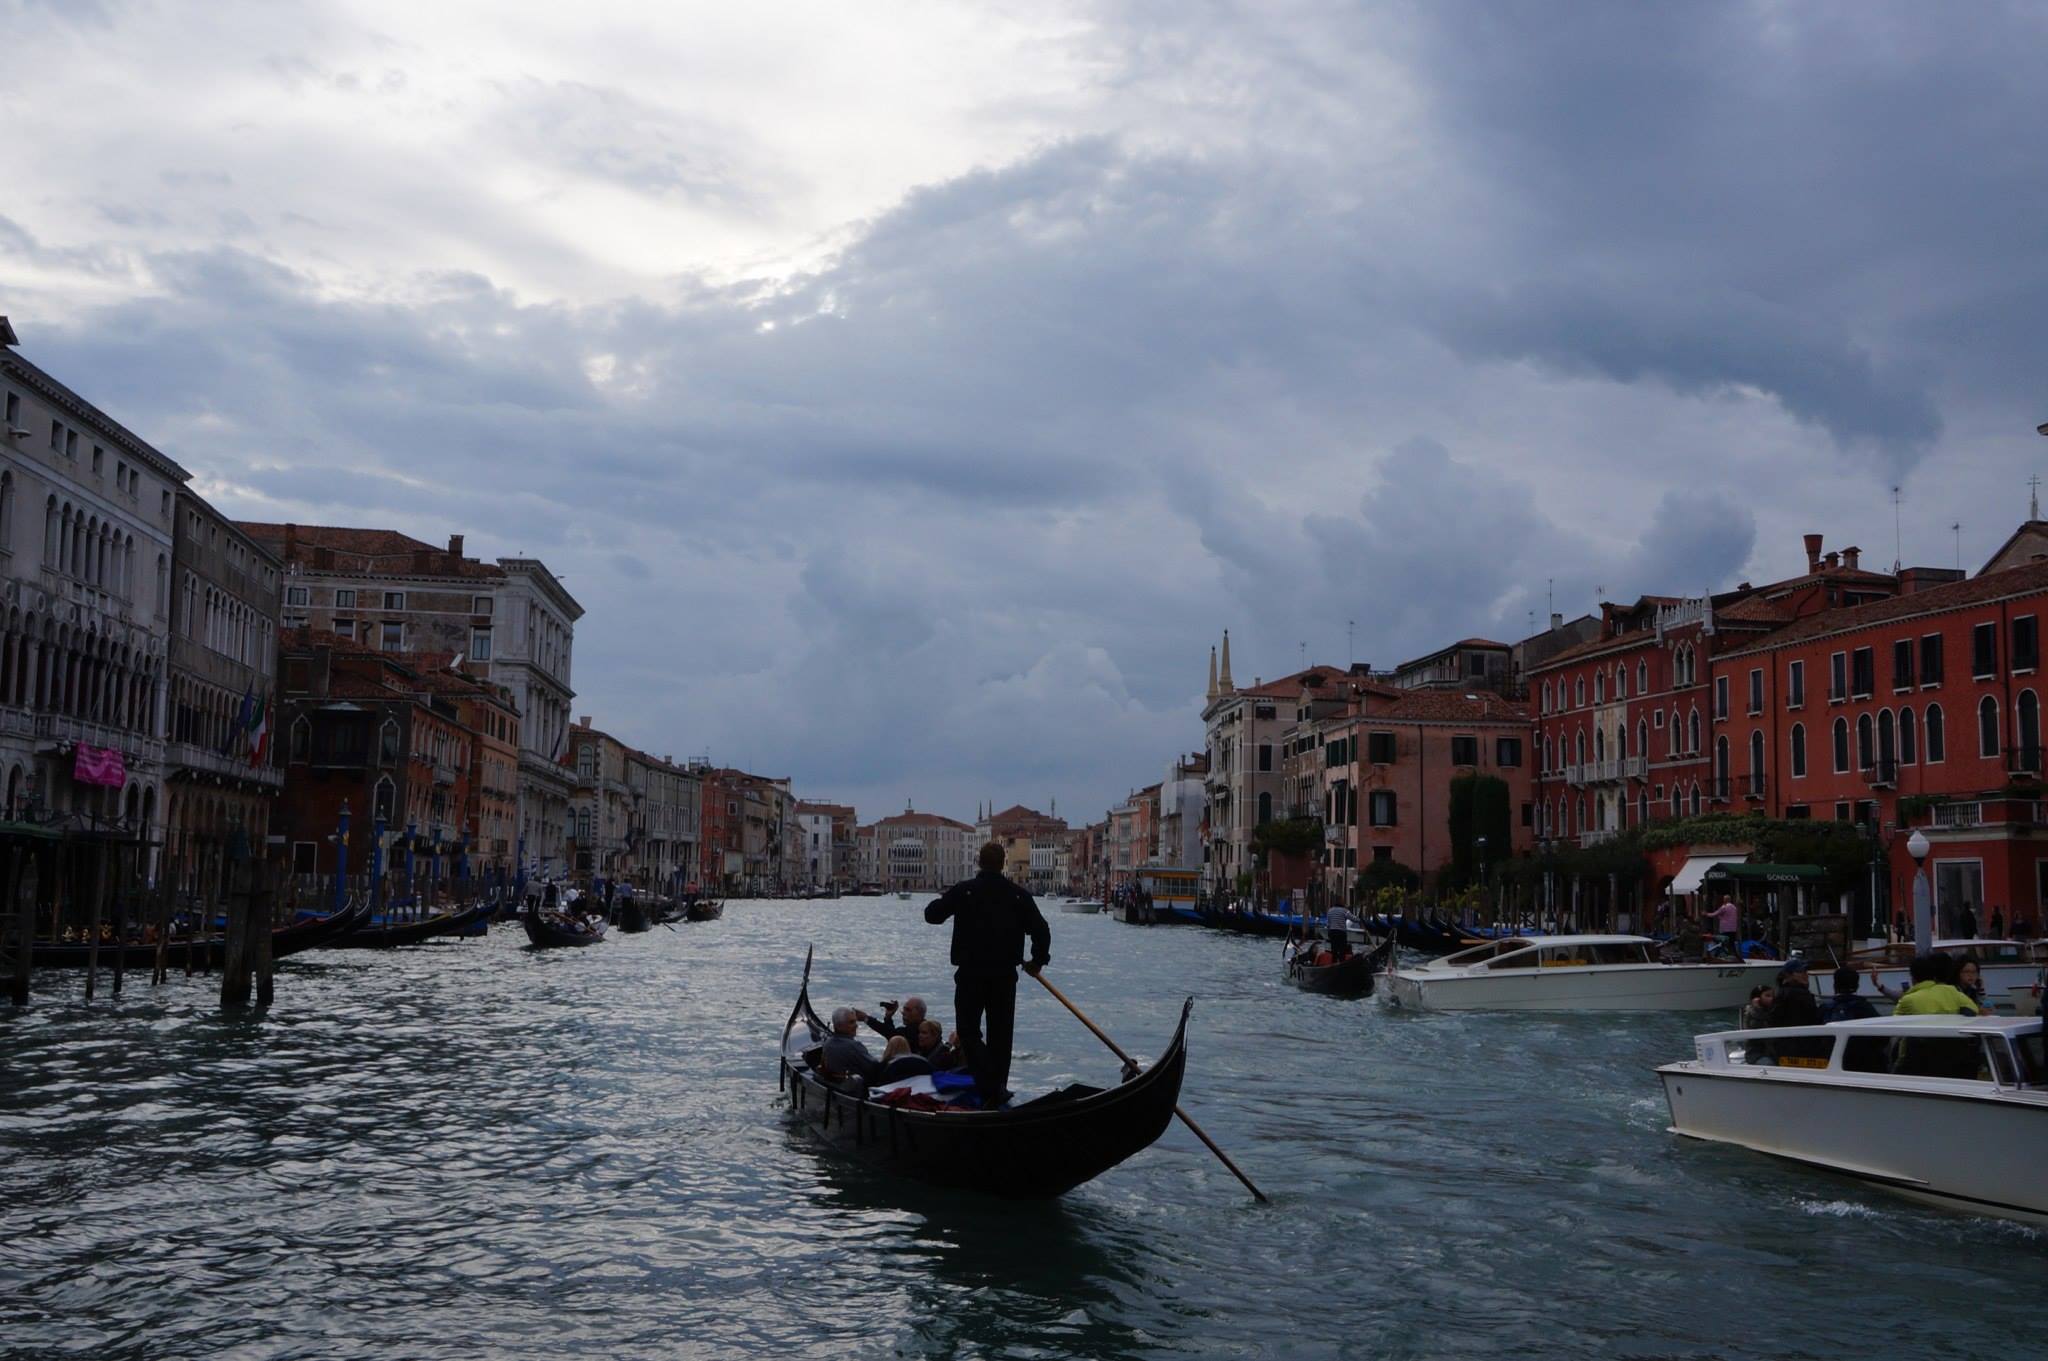
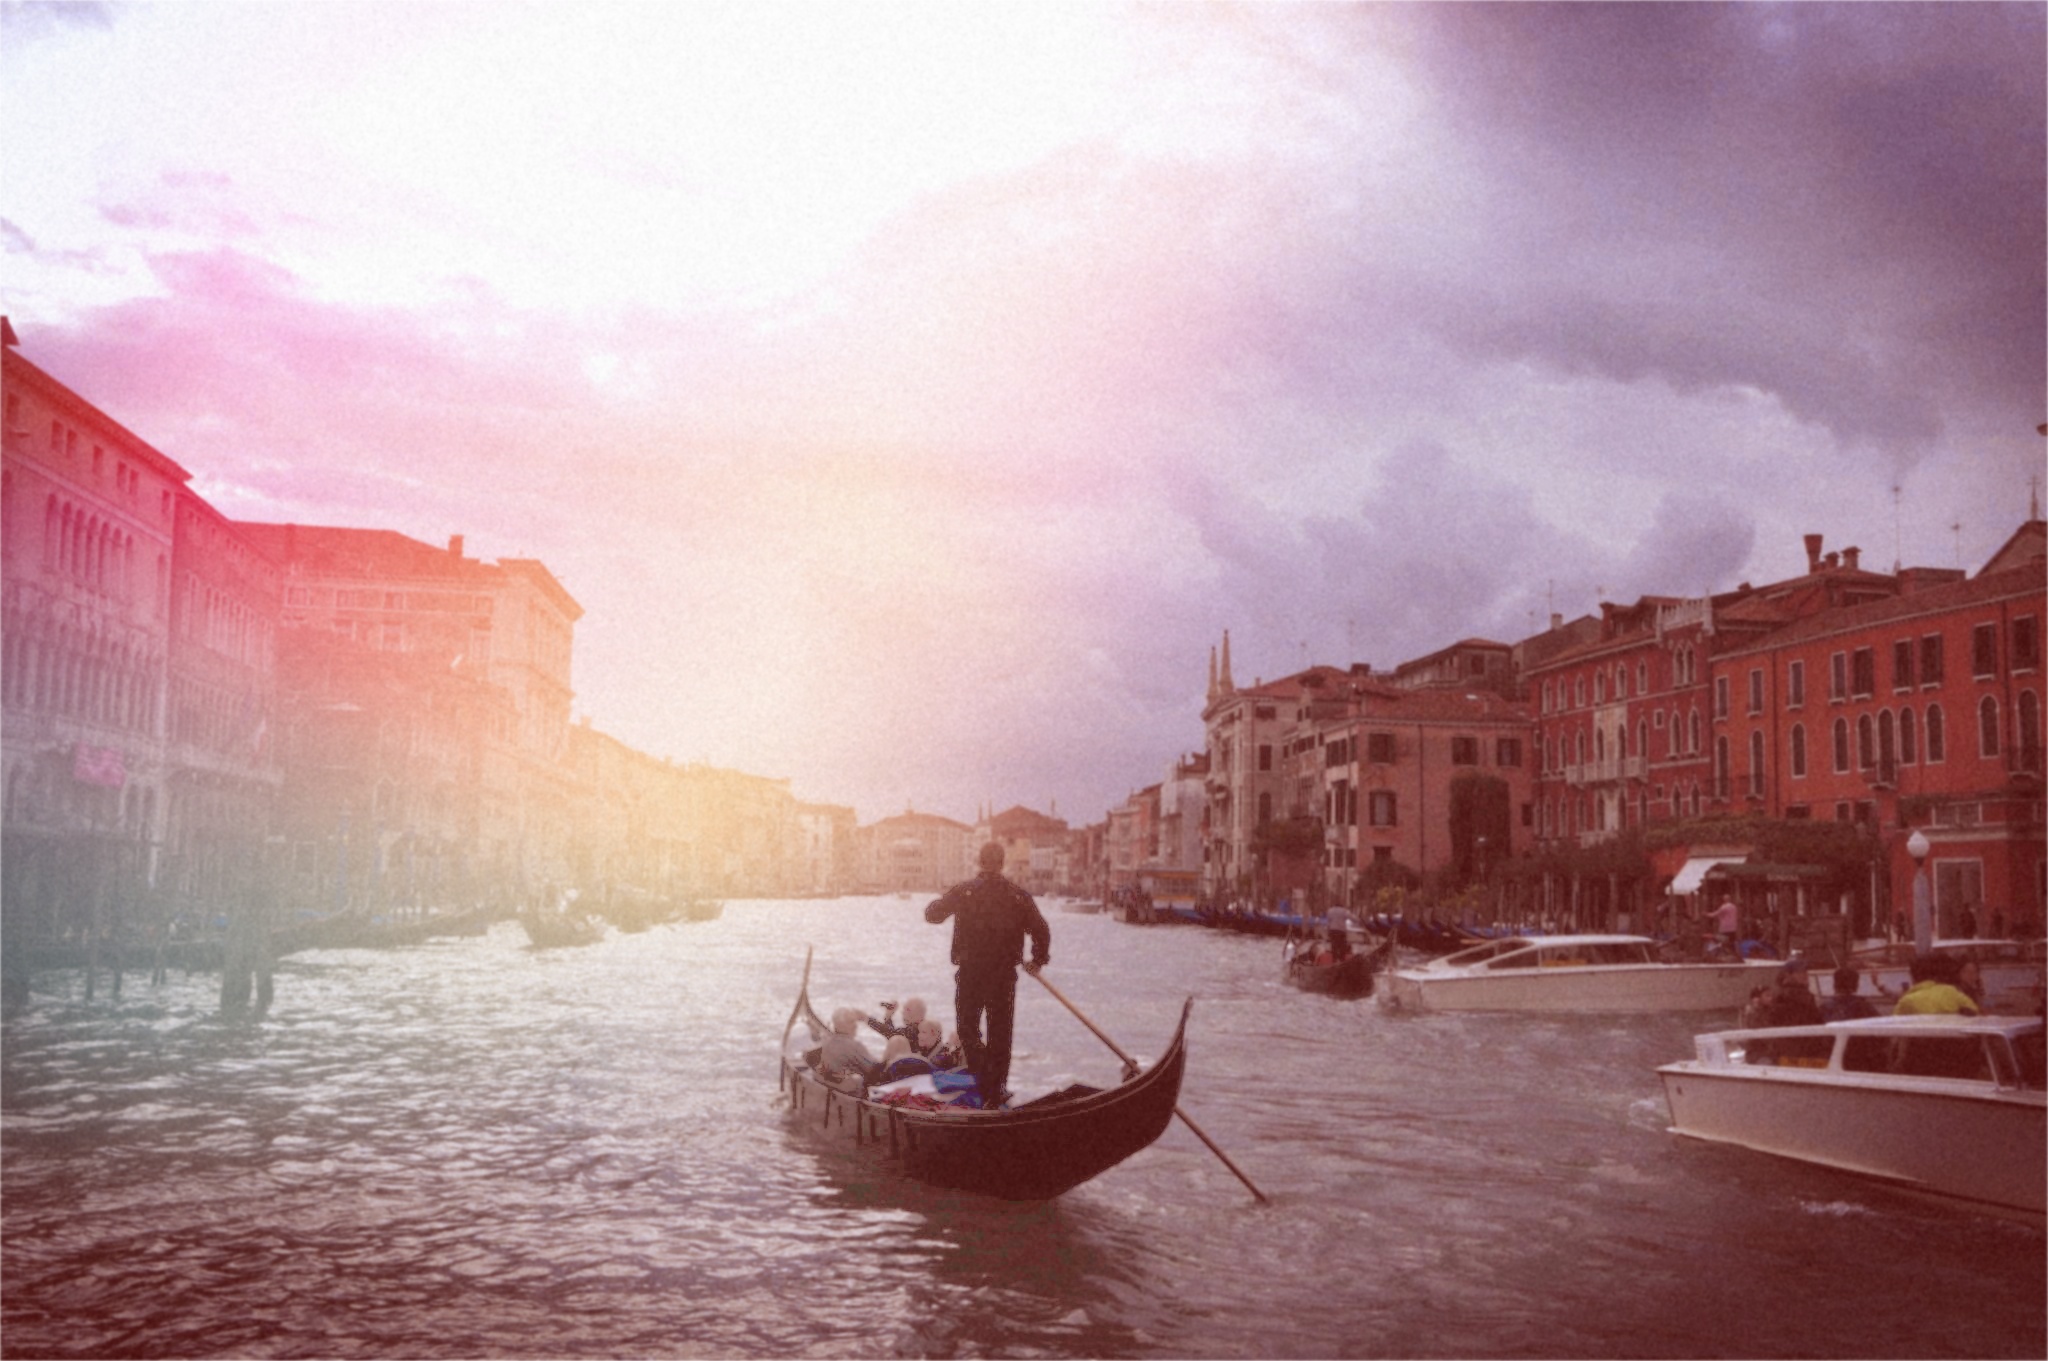
Camera: If there was ever a time to take photos, it’s on your European vacation. You cannot take a bad photo. Seriously, try pointing the camera in any direction when you’re walking down the street in Paris – everywhere you look is scenic and just plain different than what you see at home. If you’ve been planning to upgrade your camera for a while, this is the occasion. Don’t worry about looking like a tourist – remember, you stick out anyway with your funny American accent. Take photos so you can remember your adventures, and bring extra batteries/chargers/memory cards, too.

Scarves: The signature European fashion accessory is definitely the scarf. Men, women, children of all ages wear them in all colors, so casually, at all times of day, in all types of weather. It is so dang chic! Scarves are super easy to cram into even the fullest suitcase, and are a great way to stay a little warmer, dress a little fancier, or just look and feel a little more European. They’re also good to have on hand in case you need to dress a little more modestly before entering a church or other religious site with a dress code.

Quick-dry washcloth: Apparently, washcloths are more of an American thing, so they are not often supplied by European hotels. It’s definitely a personal preference, but I just wouldn’t feel clean without one. They’re not luxurious and they can be super thin, but they still lather up well and dry in a few hours. After we spent an entire day walking around Paris in the rain, I definitely appreciated a hot shower with mine.

Euros IN COINS: When out on a day trip to Versailles, we failed to bring change with us thinking euro cash or credit cards would do fine. Wrong! In order to purchase a return train ticket back to Paris using a ticket machine, we found out the hard way (along with all other Americans standing in line) that the machine took coins ONLY. Trust me on experience that the local shopkeepers get super pissed when you ask them to make change. Carry at least 10 euros in coins at all times – just in case!

Water bottle: Buying bottled water every day can be expensive. Instead, bring a water bottle that you can fill up at the hotel, museums, shopping malls, and sometimes even at old public water fountains you may find around the city (Italy has a number of old, decorative fountains for public drinking). You never know how water will taste from city to city, or how well a public water fountain is maintained, so we took Brita water bottles with built-in filters. Filtered water on the go!

Wi-fi enabled device: You might not want to pay out the nose for cell phone coverage in Europe, however I’d still bring one cell phone or tablet you can use with wi-fi in your hotel. We were glad when we found out our expected cell phone coverage didn’t work because it gave us a chance to actually unplug and enjoy our trip. We did, however, find the wi-fi helpful in checking train schedules, looking up restaurant and museum hours, and finding directions to our next site. Instead of checking Facebook, get the most out of your vacation by using the internet as a tool for just a few minutes, then getting back to your trip!

And bonus existential item you definitely need to bring: 

General awareness and respect of other cultures: The most important thing to remember is, no matter how hard you try, you are a foreigner in a foreign country, a tourist. As long as you are polite and respect the local laws and culture, you’ll be treated well by the native people you encounter. Mostly, this means refrain from being too loud and drawing too much attention to yourself. It also doesn’t hurt to learn a few basic phrases in the native language (good morning, good evening, please, thank you, where is the bathroom, etc.). We found that a little effort can go a long way in getting someone to help you.

This doesn’t mean you can let your guard down. Unfortunately, some of the stories you hear about pickpockets and swindled tourists are true. You can, however, make yourself less of a target (and trust me, once you realize this, you’ll be able to point out those people who make good ones):

  • Carry your personal items securely and close to your body. Carry items in a slash-proof purse (I do), in interior or zippered jacket pockets, or if you absolutely feel like you must, use a money belt. Keep things out of your pants pockets for the most part – thieves are way too good at getting in there.
  • Try to avoid using ATMs or use ones that look and feel secure. We used an ATM in a Venice alley that ended up being rigged with a card reader and camera to catch our pin number. Make sure to tell your bank the specific dates you’ll be traveling so they can help keep an eye on your account. We tried to use our credit card as much as possible.
  • Trust yourself, first. If you think something smells fishy – a price is too high or too low – that designer bag looks fake – this guy is being super creepy – then go with your gut. Unfortunately, there are people out there who target tourists for all sorts of scams. Not everyone you encounter on the street is out to get you, but definitely trust yourself if you feel uncomfortable.
  • And finally, always be aware of your surroundings, your belongings and keep an eye on your fellow travelers, just like they should do for you. Keep your wits about you and enjoy yourself!

Most importantly, have fun because, duh, you’re in Europe! Bon voyage!

An easy bathroom remodel à la Paris

easy bathroom remodel cover photo

It’s that time of the year to kick home improvement into high gear!

The downstairs powder room is the tiniest room in the house, and definitely not the most glamorous, but it’s one we, and our guests, often use. I decided it was time to take it from boo to blue! With a fresh coat of paint, and without ripping out the major fixtures, I think I turned this little bathroom into a little slice of luxe without a lot of $$$.

My Easy Bathroom Remodel: Getting Started

For the walls, I chose a bold blue color (Behr’s Royal Peacock). I’ve heard saturated colors can make a room feel too dark or too small. But seriously, let’s be honest, you’re in the bathroom and you know you’re in the bathroom. Who needs wide open spaces? Embrace that cozy feeling while you…you know…go!

Easy bathroom remodel before photo

Original color was just about as exciting as it’s name – “Oatmeal.”

Easy bathroom remodel before photo

Taking down the mirror made the bathroom even darker.


With Royal Peacock on the walls and a fresh coat of white paint on the trim, I could see the white sink and toilet were really popping. To continue that effect, we replaced our standard chrome towel ring and toilet paper holder for white (less than $9/each at Home Depot and they’re metal, not plastic!). On top of that, we cautiously ripped off the builder’s grade mirror and replaced it with a bright white framed mirror that I found at Home Goods for $20! That’s what I call a bargain!

easy bathroom remodel new mirror

Check out that detailing!

Easy Bathroom Art

Now for the details! To me, this blue color felt very Parisian chic, so I decided to create easy Paris-themed wall art, via Pixelmator, that I could print at home on card stock and frame with store-bought white frames. I also added a framed version of my macarons wall art. Boom! Done!   

easy bathroom remodel Paris wall art

easy bathroom remodel Paris wall art

Original art by moi.

I then ordered a couple white accent shelves off of Wayfair.com for only $22/each to put above the toilet. I added a few easy knick knacks found at Michael’s and Pier 1, themed in white and golden yellow, as well as some new white hand towels.

easy bathroom remodel toilet shelves

With the last touch ups done, the bathroom makeover is complete! Despite all the cramped painting work, I think it turned out terrific and was a week well spent! Tons of thanks to the hubby for helping out – touching up those little paint spots behind the toilet is definitely one of the circles of hell.

easy bathroom remodel blue Paris

My dinner party recipes for 4 people

We had a couple friends over this past weekend for dinner. We don’t entertain very often, so when we do, I like to go all out. Lots of good food, good wine and good music. The most important thing about a dinner party takes place before anyone takes their first bite: the planning.

I’m very practical when it comes to party planning. I don’t want to be in the kitchen all night, catching bits and pieces of conversation in between chopping and sautéing. I want to be in the thick of it all night long! So planning a meal where food is easy to either prepare ahead of time or with minimal kitchen time is key. Also, I never want to make anything too complicated, otherwise we might just be ordering pizza…

“Shit. Honey, do you think Dominos or Pizza Hut will go better with that Cabernet?”

Dinner Party Recipes for 4 people:

For this dinner, I decided to turn to my Ina Garten cookbook, Barefoot Contessa Foolproof: Recipes You Can Trust, for inspiration. I absolutely love Ina. Watch Barefoot Contessa on Food Network and you’ll see what I mean. Also, the word “foolproof” is in the title. How hard could it be?

**I’ll apologize in advance: there are not many photos since I’m still new to this whole blogging thing and forgot to take any but I wanted to share anyway so trust me, you’ll live.**

Mustard Marinated Flank Steak:

Totally tendarized by scoring and then soaking in marinade of dijon mustard, dry white wine, olive oil, shallots, garlic, and fresh tarragon. Marinade the night before, then only 10-15 minutes on the grill. You can google this recipe or buy the book, trust me the photos alone will make you drool.

Truffled Mashed Potatoes:

I ordered truffle butter from an online gourmet food shop, D’Artagnan. I peeled and cubed the potatoes a couple hours before and put them in to boil as soon as our friends arrived. These potatoes were a HUGE hit, and my husband even said they’re the best he’s ever had (a real compliment since his mom’s are pretty darn good, too).

Oven-Roasted Asparagus:

This isn’t out of my cookbook, but it’s still Ina’s recipe nonetheless. It’s the easiest recipe and with it, it’s quickly made asparagus my husband’s favorite vegetable. The tops get just crispy enough. I prepped the asparagus before dinner so all I had to do was pop in the oven and hit the timer. Divine!

The Perfect Cheese Board

With the main course on the books, I wanted to serve an appetizer that was just as delicious but also just as easy to prep ahead of time. What is easier, or more delicious, than cheese? There are a few general “rules” regarding putting together a cheese plate, and sure, I read them, but then I just picked what I thought was interesting and would taste good. You really can’t go wrong with cheese! Here’s how it turned out:

easy cheese plate diagram

Regarding dessert, I let our guests have the honors. It always takes some of the stress off the hostess if she can delegate a course or two. It helps when your friends are pros in the kitchen and are preparing to enter the Pillsbury Bake-Off.

Finally, and call me a dork if you want, but I like to put together a music playlist to have on throughout the evening. Adds a little ambience, you know? To end this post, here are a few of my fave songs right now from my “Dinner Party” playlist. Cheers!

Pixel Me This: Pixelmator Photo Editing

I’m addicted to photo editing this week. I’m all over Pixelmator, a Mac-only software that is great for me because it can do pretty much anything I (and all n00bs) would ever want to do with photo and image design à la Photoshop, and also because it only costs $30 (instead of a pound of flesh). Sweet deal!

Maybe you’re like me and have a ton of photos from trips and vacations, and even wedding photos, stored on your computer but you don’t know what to do with them so none of them see the light of day. Once I tried to take charge and get “creative” by having a wedding photo of us printed on a big gallery-wrapped canvas (I had an online deal) and when it came I realized, hm, it’s kind of awkward to have a giant photo of myself on display in my living room. I didn’t quite think that one through. But being able to “play” with all of my photos using Pixelmator has shown me that there is so much more to do with photos than simply printing and framing. You can make real works of art! And there are a lot of tutorials out there to help you get started.

Here are a few of the photos I messed around with:

Before Pixelmator photo editing

Before Pixelmator

After Pixelmator photo editing

After Pixelmator

Gondolier Before Pixelmator photo editing

Gondolier Before

Gondolier After Pixelmator photo editing

Gondolier After

Rattlesnake Lake Before Pixelmator photo editing

Rattlesnake Lake Before

Rattlesnake Lake After Pixelmator photo editing

Rattlesnake Lake After

Beat that, Instagram! I’ve learned a lot in the past week and that got me thinking – what should my first big project be?

My husband and I wrote our own wedding vows and once they were said, we never read them again. But I remember how emotional we were hearing our own words and I’ve wanted to feature them in our home, above our bed, to remind us of our dedication to each other. (Also, the big wall above our bed is completely empty and sad.) Before I got started, I googled “wedding vow art.” There are a lot of great ideas out there but the crazy thing is, there are Etsy shops dedicated to creating customized prints of wedding vows that charge $50 and up! And sometimes that is only for the digital file.

Using the internet for inspiration, our wedding photos as a backdrop, and Pixelmator for the design work, I think I created a couple of prints of our vows that I’m proud to say I made myself. Although I’m not sure how I want them printed (on canvas or simply printed and framed), I’m 100% committed to getting these off my laptop and into the bright light of day.

Pixelmator wedding vows art Pixelmator wedding vows art

Easy fabric wall art: Go bold or go home

easy fabric wall art cover

Even after a year in our first house, we’re still slow to “make it our own” by getting things up on the walls.  I think the downstairs is done, so I looked upstairs for my next craft project. I have a writing nook with a desk and chair underneath a window adjacent to a fairly large blank, colorless wall in need of some love.

easy fabric wall art before photo

Could this wall be any less inspiring?

Enter Pinterest. I found a project turning plain canvases and some fabric into bold fabric wall art. One minute I’m watching a how-to video, the next minute I’m roaming around JoAnn Fabrics, my eyes glazed over. By the end of the day, voila, fabric wall art, as simple as that!

What you’ll need to make your easy fabric wall art:

  • plain wooden-framed canvases
  • fabric
  • scissors
  • staple gun (I used 1/4″ heavy duty staples)
  • eye protection (safety first, people)

Directions:

1) I purchased three canvases at Michaels, 16″ x 20″. Canvas can get pricey, so I purchased the most basic quality. I purchased 2 yards of fabric total to cover the canvases. You want enough fabric so you can wrap the edges of the frames. Here are the patterns I picked:

easy fabric wall art birds

So chic birds ca-cawed my name.

easy fabric wall art stripes

Sassy gold, black and grey stripes.

2) Measure and cut the fabric you need for each canvas. Iron the cut pieces of fabric to get out all the wrinkles.

3) Place the fabric pattern side down with the canvas frame on top, wooden frame facing up. Make sure there is enough fabric so you can wrap each edge, just like the manufacturer already did with the canvas over the frame.

easy fabric wall art prepare frames

Lay canvas frame backside up on fabric.

4) Safety goggles on now, please! (Or, if you’re like me, you won’t know where your husband put the safety goggles so you’ll resort to some sunglasses.) Wrap one edge of the fabric over the canvas frame and put a staple every few inches across to secure it to the frame. Make sure the edge is even and does not pucker.

easy fabric wall art wrap frames

Staple every couple of inches along each edge.

5) Repeat the stapling procedure for the opposite side of the frame so that the fabric is evenly stretched across the frame.

easy fabric wall art staple gun

Staple gun badass – don’t forget eye protection!

6) Repeat with the remaining two sides of the frame.

7) Now for the corners! It’s best to watch the video for this, but in my own words, it’s similar to how you wrap a gift. Put two staples in each corner.

easy fabric wall art wrap frames

Wrap the corners last with two staples each.

Turn over your canvas. It looks amazing, right? Now repeat for the rest of your canvases. How easy was that? What else can you staple? You’re a serious pro!

easy fabric wall art set of three

Top Weekend in Napa Itinerary Ideas

We just got back from our annual trip to Napa Valley. Even though I came down with one of the worst colds of my life (tissues were worth their weight in gold), we still had an amazing time with good food and good wine. The Seattle rain today really has me missing the warm weather – good thing we have a case of wine shipping up here to last us the rest of winter. This year, we stayed in Yountville, just north of the city of Napa. Here’s what we loved about Napa this time around…and what we’ll definitely pass on next time.

Cheered: 

Bouchon/Bouchon Bakery:  For those of us who can’t (or frankly would never choose to) afford Thomas Keller’s French Laundry, Bouchon is a more than adequate alternative, especially for lunch. The steak frites with truffle fries is my favorite Napa meal, while the scallops are the best my husband has ever had. It’s an expensive lunch, but that steak fills me up so much that I skip dinner. Bouchon Bakery next door ALWAYS has a line, but it’s worth the wait. When you walk in, prepare to ‘oo’ and ‘ahh’ at the display case. Oh, you thought you already knew what you wanted? Fugettaboutit! The “Oh-noyoudidn’t” is a chocolate dipped macaron. Enough said.

Napa Weekend Itinerary Bouchon

Bouchon: That’s probably French for ‘yum.’

Ma(i)sonry: Located in in one of the oldest buildings in Yountville, this winery collective and contemporary art gallery looked like the kind of place I’d be intimidated by with its expensive modern art and hipster employees. But our extremely positive experience shattered that expectation! Each host was very friendly (it didn’t hurt that they’re native Marylanders, like us). The tasting experience is unique in that 1) it usually takes place in their sunny sculpture garden surrounded by interesting art, and 2) instead of a set tasting menu, your personal host will bring wines for you to try based on your palette preferences. With wines that range from $12/bottle to $250/bottle, there really is wine for every palette in every price range, and remember, these are wines you really can’t purchase anywhere else  – these boutique wineries don’t even have tasting rooms. The icing on the cake – shipping to Seattle was only $11!

Napa Weekend Itinerary Maisonry

Ma(i)sonry: Beautiful day, beautiful building.

The Vintage Inn: Out of all my travels, this might be my favorite hotel – no kidding. Even though I was pretty sick this whole trip, this Yountville hotel was extremely comfortable. It’s perfectly located, and even if it wasn’t, the grounds of the hotel are beautiful enough, with fountains, flowers, and lux pool, that it’s hard to leave. The second floor rooms have spacious balconies and wood-burning fireplaces that come with Duraflame logs and a bottle of wine. On top of all of that, the complimentary breakfast cannot be beat with mimosas and bloody marys, an omelette bar (the omelette guy is a serious pro), waffle bar, and so many other pastries and traditional breakfast foods. We had a wonderful stay and will definitely be back.

Jeered:

Bottega: Celebrity-chef Michael Chiarello’s restaurant was crazy loud – so loud my husband and I didn’t speak most of dinner because we couldn’t hear one another from across the table! It’s one of those menus where they encourage you to get an appetizer, a “primi” pasta dish and “secondi” main course. You would think the dishes would get better and better with each course, but it was just the opposite. A beautiful, fresh antipasta app, a simple but tasty pasta carbonara, and the just ‘meh’ spare ribs. With so many courses, we were too full, and too put off by the noise, we couldn’t make it to dessert.

Mumm Napa: Mumm is one of our go-to sparkling wines when we stop at Bev-Mo so we thought hey, let’s visit the source. Their tasting room is in a gorgeous location in a valley of grape vines and they have a photography gallery on-site featuring an impressive Ansel Adams collection. Unfortunately, the service was as dry as the wine. Our host did not show any enthusiasm for the wine, or for us. “Take a look at the tasting menu and when I come back, I want to see some ID.” I wonder if he was a police officer or a high school teacher in his previous career? He dropped off the tasting bill without a word. Needless to say, the closest we’ll be to Mumm again will be at our local Bev-Mo where the service is always great!

Napa weekend itinerary mumm

Mumm: Gorgeous grounds, grumpy service.

Stag’s Leap Wine Cellars: Also known for the “million dollar apostrophe.” I know, I know, this is a Napa Valley legend, but honestly, I was not wowed by the wine or the tasting room experience. I have a feeling this winery is always packed, and our visit was no exception. We were luckily able to get a space standing at the tasting bar with a nice gentleman to pour our wine. For all the hype, the wines just didn’t stick with me the way I thought they would for the cost. Checking it off the Napa Valley bucket list and moving on.

Napa weekend itinerary stag's leap

Stag’s Leap: Not to be confused with Stags’ Leap.

All and all, another great trip to Mecca…I mean, Napa Valley. Now if only I can get rid of this cold, sinus infection, plague, whatever. Looking forward to planning another trip for next year…with less cold medication!